
Rammed Earth Veneer
HOME » Rammed Earth Veneer


Rammed Earth Veneer
Introducing our Eco-Friendly Rammed Earth Veneer – a modern take on an ancient Chinese building material. Traditionally, rammed earth construction involved a meticulous process of compacting a mixture of red clay, coarse sand, and lime, known as “Sanhetu,” to eliminate air gaps and ensure solidity. Our innovative tiles mimic this traditional material using a blend of stone powder and quartz sand, ensuring the color is natural without any dye, making them both durable and fade-resistant. These easy-to-install tiles require no tamping or spraying; simply peel and stick directly onto walls. Flexible and waterproof, they are perfect for curved surfaces and columns, offering a simple way to achieve a rustic, environmentally-friendly, and serene architectural style. Elevate your space with the timeless appeal of rammed earth, redefined for modern use.
Product Specifications
| Item | Details |
|---|---|
| Name | Rammed Earth Veneer |
| Material | Quartz sand, stone powder |
| Size | 600*1200mm |
| Thickness | 2.7±5mm |
| Surface | A rammed earth textured finish |
| Application | Exterior wall and interior wall decoration projects for farm house, restaurant, bars, coffe shops etc. |
Modern Farm External Wall -Rammed Earth Veneer
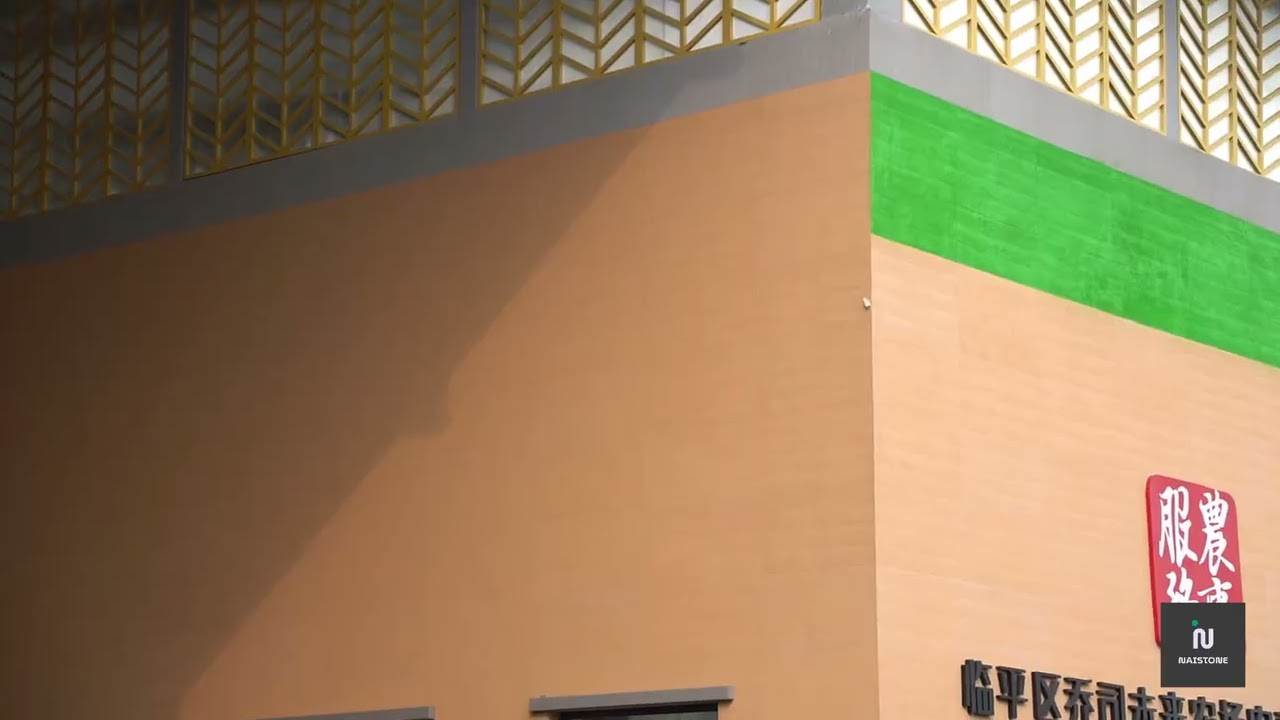
Advantages of NAI STONE Rammed Earth Veneer
Lightweight
With a weight of only 4kg/m² and an adhesion strength exceeding 800Kpa, it offers high bonding durability.
Thin
With a thickness of just 2.7±0.5mm, it has a low thermal conductivity, reducing the thermal stress on walls.
Flexible
With a minimum bending diameter of 200mm, it easily conforms to curved and irregular surfaces like columns.
Cost-Effective
Closer to the texture of real stone than paint, weather-resistant for up to 30 years, and significantly lower in cost compared to natural stone.
Safe
High adhesion strength and flexible properties absorb shear stress from thermal expansion and contraction, reducing the risk of detachment.
Long Lifespan
Crack-resistant, alkali-resistant, waterproof, stain-resistant, aging-resistant, and impact-resistant.


FAQs
Installing rammed earth veneer is a straightforward process, similar to installing other types of wall veneers. Here’s a step-by-step guide to help you achieve a successful installation(visit installation guide):
Surface Preparation:
- Clean the Surface: Ensure the wall surface is clean, dry, and free of dust, dirt, grease, or loose material.
- Repair Any Damage: Patch any holes or cracks and make sure the wall is smooth and even.
Materials and Tools Needed:
- Rammed earth veneer panels
- Adhesive suitable for stone veneer
- Notched trowel
- Level
- Measuring tape
- Tile spacers (if needed)
- Wet saw or tile cutter
- Grout (optional)
- Sealer (optional)
Applying Adhesive:
- Choose the Right Adhesive: Use a high-quality adhesive that is compatible with rammed earth veneer.
- Apply the Adhesive: Using a notched trowel, spread the adhesive evenly on the wall surface in a small section. Work in small areas to prevent the adhesive from drying out before you can apply the veneer.
Installing the Veneer:
- Place the Veneer Panels: Press the rammed earth veneer panels firmly into the adhesive. Start at the bottom of the wall and work your way up.
- Check for Level: Use a level to ensure each panel is straight and properly aligned. Adjust as necessary.
- Use Spacers: If you’re using tile spacers, place them between the panels to ensure even spacing.
Cutting and Fitting:
- Measure and Cut: Measure any spaces that need custom-sized panels. Use a wet saw or tile cutter to make precise cuts.
- Smooth Edges: If necessary, smooth the cut edges with sandpaper or a stone file.
Grouting (Optional):
- Apply Grout: If you want to grout between the panels, apply the grout using a rubber float, pressing it into the joints.
- Clean Excess Grout: Wipe away excess grout with a damp sponge before it dries.
Sealing (Optional):
- Apply Sealer: Once the adhesive and grout are fully cured, apply a sealer to protect the veneer and enhance its durability.
- Follow Instructions: Follow the sealer manufacturer’s instructions for application and curing times.
Finishing Touches:
- Remove Spacers: Once the adhesive is set, remove any tile spacers.
- Clean the Surface: Clean the veneer surface with a damp cloth to remove any remaining adhesive or grout residue.
By following these steps, you can achieve a professional-looking installation of rammed earth veneer that will enhance the beauty and durability of your space.
The lifespan of rammed earth veneer is generally very long, often lasting several decades or even longer with proper care and maintenance. Here are some factors that contribute to its durability:
Material Quality: High-quality rammed earth veneer is made from natural earth materials that are compacted to create a strong and durable finish.
Installation: Proper installation is crucial to ensure the longevity of rammed earth veneer. Correct application techniques and the use of appropriate adhesives and sealants can enhance its durability.
Maintenance: Regular maintenance, such as cleaning and sealing, can help protect the veneer from environmental factors and wear over time.
Environmental Resistance: Rammed earth veneer is inherently resistant to weather and temperature fluctuations. When properly sealed, it can resist moisture and prevent damage from freeze-thaw cycles.
Location and Use: The lifespan can also depend on where and how the veneer is used. Interior applications tend to last longer due to less exposure to harsh weather conditions, while exterior applications can still be very durable if properly maintained.
Overall, with proper installation and maintenance, rammed earth veneer can provide a long-lasting, beautiful finish to any structure, ensuring its appeal and functionality for many years.
The cost of rammed earth wall panels can vary widely depending on several factors, including the type of panel, the complexity of the design, and regional construction costs. Here are some general considerations:
Type of Panel:
- Precast Rammed Earth Panels: These are more expensive due to the greater volume of material and the need for heavy machinery during installation. Costs can range from $100 to $300 per square foot, depending on the project specifics.
- Rammed Earth Veneer Panels: These are typically less expensive as they use less material and are easier to install. Costs can range from $50 to $150 per square foot.
Complexity of Design:
- Custom designs, intricate patterns, or specific aesthetic requirements can increase the cost due to the additional labor and precision needed during manufacturing.
Installation Costs:
- Precast Panels: Installation requires specialized equipment and skilled labor, adding to the overall cost. Site preparation, transportation, and installation can significantly impact the total expense.
- Veneer Panels: Easier and quicker to install, resulting in lower labor costs. However, the condition of the existing wall and the method of attachment can influence the final price.
Location and Availability:
- Regional variations in construction costs, availability of materials, and local labor rates can affect the overall price.
Additional Considerations:
- Factors such as transportation distance, site accessibility, and any necessary site modifications can also influence the total cost.
For a precise estimate, it is recommended to consult with local suppliers or contractors who specialize in rammed earth construction. They can provide detailed quotes based on the specific requirements of your project.
Yes, rammed earth can be prefabricated. It's easy to use NAI STONE's rammed earth veneer for interior and exterior wall claddings. Prefabrication involves creating rammed earth panels or blocks in a controlled environment off-site, which are then transported and assembled on-site. This method offers several benefits:
Quality Control: Prefabricating rammed earth panels allows for better control over the consistency and quality of the materials and construction process.
Efficiency: Prefabrication can significantly reduce construction time on-site, as the panels or blocks are pre-made and simply need to be assembled.
Weather Independence: Creating rammed earth components in a controlled environment eliminates delays caused by adverse weather conditions.
Reduced Waste: Prefabrication can minimize material waste and improve resource efficiency.
Versatility: Prefabricated rammed earth can be customized to fit specific design requirements and architectural specifications.
Overall, prefabricating rammed earth combines the traditional benefits of this sustainable building material with modern construction efficiency and precision.
Precast rammed earth panels and rammed earth veneer panels serve different purposes and have distinct characteristics:
Thickness and Structure:
- Precast Rammed Earth Panels: These are thick, solid panels made entirely of compacted earth. They provide structural support and can be used as load-bearing walls.
- Rammed Earth Veneer Panels: These are thin panels designed to be applied as a facing material over an existing structural wall. They are not load-bearing and are primarily for aesthetic purposes.
Weight:
- Precast Rammed Earth Panels: Being thicker and solid, these panels are much heavier and require significant structural support during installation.
- Rammed Earth Veneer Panels: These are lighter due to their reduced thickness, making them easier to handle and install.
Installation:
- Precast Rammed Earth Panels: Installation involves lifting and positioning heavy panels, often requiring cranes and specialized equipment. They can be used for both interior and exterior walls.
- Rammed Earth Veneer Panels: These are typically adhered or mechanically fastened to an existing wall surface, similar to installing tile or stone veneer. They are easier and quicker to install.
Applications:
- Precast Rammed Earth Panels: Suitable for projects requiring both the structural and aesthetic benefits of rammed earth. Commonly used in large-scale constructions where the natural thermal and acoustic properties of rammed earth are desired.
- Rammed Earth Veneer Panels: Ideal for projects where the visual appeal of rammed earth is desired without the need for additional structural support. Often used for interior feature walls or exterior cladding.
Cost:
- Precast Rammed Earth Panels: Generally more expensive due to the higher material volume and the need for heavy machinery for installation.
- Rammed Earth Veneer Panels: More cost-effective as they use less material and are easier to install, reducing labor and equipment costs.
Understanding these differences helps in choosing the right type of panel for your specific project needs, balancing structural requirements with aesthetic goals and budget constraints.
Rammed earth wall construction is a traditional building method that involves compacting a mixture of subsoil, clay, sand, and sometimes cement or lime within formwork to create solid, durable walls. Here are the key details involved in rammed earth wall construction:
Material Selection:
- Subsoil: The primary material, usually consisting of clay, silt, and sand.
- Stabilizers: Cement or lime can be added to improve strength and durability.
- Aggregates: Gravel or small stones may be included for added strength and texture.
Formwork:
- Structure: Formwork is built to shape the walls. It can be made of wood, metal, or other strong materials.
- Placement: Formwork is placed on a solid, level foundation to ensure stability.
Mix Preparation:
- Proportioning: The correct proportions of subsoil, stabilizers, and water are mixed to achieve the desired consistency.
- Testing: Small test batches are often made to ensure the mix achieves the required strength and durability.
Layering and Compaction:
- Layering: The prepared mix is placed in the formwork in layers, typically about 4 to 6 inches thick.
- Compaction: Each layer is compacted using pneumatic rammers or hand rammers to ensure density and stability. Compaction continues until the material is solid and has minimal air pockets.
Curing:
- Initial Curing: The compacted layers are left to cure for a short period, often a day or two, before adding additional layers.
- Final Curing: Once the wall is fully constructed, it is left to cure for several weeks to achieve full strength. The curing process can be enhanced by keeping the wall moist.
Formwork Removal:
- Timing: Formwork is typically removed once the wall has gained sufficient strength to support itself.
- Careful Removal: Care is taken to avoid damaging the fresh wall surfaces during formwork removal.
Finishing:
- Surface Treatment: The surface of the rammed earth wall can be left natural or treated with sealants to enhance durability and resistance to weather.
- Additional Layers: In some cases, a final thin layer of finer material may be applied to achieve a smoother finish.
Structural Considerations:
- Reinforcement: Steel reinforcement bars or mesh may be used for additional structural support, especially in seismic zones.
- Thermal and Moisture Control: Insulation layers or barriers may be added to improve thermal performance and moisture resistance.
Design Flexibility:
- Aesthetic Options: Pigments and various aggregates can be added to the mix to achieve different colors and textures.
- Architectural Features: Openings for doors and windows are integrated during the formwork stage, and additional architectural elements can be incorporated into the design.
Rammed earth construction combines sustainability, beauty, and durability, making it a popular choice for eco-friendly and aesthetically pleasing buildings. Proper planning, material selection, and construction techniques are crucial to ensure the success and longevity of rammed earth walls.
Yes, our rammed earth veneer can be used on curved rammed earth walls. Here’s why it’s suitable:
Flexibility: The veneer is designed to be flexible enough to conform to various shapes, including curved surfaces. This allows for a seamless application on curved walls without cracking or breaking.
Lightweight: The lightweight nature of our rammed earth veneer makes it easier to handle and install on curved surfaces, ensuring it adheres properly without adding excessive weight to the structure.
Adhesive Compatibility: High-quality adhesives that are compatible with rammed earth veneer ensure strong and durable bonding on curved surfaces, maintaining the structural integrity of the installation.
Aesthetic Consistency: Using the same veneer on both flat and curved sections of your project ensures a consistent aesthetic, providing a uniform appearance throughout the entire wall.
Customization: Our veneer can be custom-cut to fit the specific contours of your curved walls, ensuring a perfect fit and a smooth finish.
By using our rammed earth veneer on curved rammed earth walls, you can achieve a beautiful, cohesive look that leverages the natural beauty and durability of rammed earth, even on complex architectural features.
A rammed earth exterior wall can last for several decades, and even up to a century or more, with proper construction and maintenance. Here are the key factors that contribute to its longevity:
Material Quality: High-quality materials and proper soil composition are essential for the durability of rammed earth walls. The right mix of sand, silt, clay, and stabilizers (like cement or lime) enhances strength and weather resistance.
Construction Techniques: Proper compaction during construction ensures density and structural integrity. Skilled craftsmanship and adherence to best practices are crucial for creating long-lasting walls.
Stabilization: Adding stabilizers such as cement or lime can significantly increase the lifespan of rammed earth walls by improving their resistance to erosion, water damage, and wear.
Protection from Elements: Protecting the wall from direct exposure to rain and moisture is important. Roof overhangs, proper drainage, and sealing the surface can help prevent water penetration and erosion.
Maintenance: Regular inspection and maintenance can prolong the life of rammed earth walls. This includes repairing any cracks, sealing the surface periodically, and addressing any issues with drainage or water exposure.
Environmental Conditions: The local climate and environmental conditions play a role in the durability of rammed earth walls. In dry climates, rammed earth walls tend to last longer with minimal maintenance, while in wetter climates, additional protective measures may be necessary.
Architectural Design: Design features such as overhangs, protective coatings, and proper foundation work can enhance the longevity of rammed earth walls by providing additional protection from environmental stressors.
Overall, with high-quality materials, skilled construction, and regular maintenance, a rammed earth exterior wall can provide a durable, sustainable, and aesthetically pleasing solution that lasts for many decades.
Contact Us Today!
Discover how NAI STONE can transform your next project with our innovative and versatile flexible stone tiles. Reach out to us for more information and to explore how we can collaborate to achieve outstanding results. Let’s work together to create stunning, sustainable, and safe spaces.